How To Create Member Maps with Google MyMaps
How To Create Member Maps with Google MyMaps
Step 1: Export your Member Data
Determine what data you want to visualize. Depending on your organization’s needs, you may want a simple snapshot of all members, or segment it down into certain member types or attributes (remember, whatever data you choose, you’ll need physical addresses).
Select or create the report you want to use in your database, and export (at a minimum) the member name and address information into a .csv or .excel file.
Step 2: Make a Member Map using Google MyMaps:
- First, sign into your Google account. Then go to google.com/mymaps and click Create a New Map. For detailed instructions on how to use MyMaps, check out Google’s Help Center.
- Upload your Member data .csv or .excel file into Google My Maps.
- To add another layer, click the Add Layer icon.
- Once you’ve uploaded your data, the map program will provide a visual of your member locations.
Formatting tips:
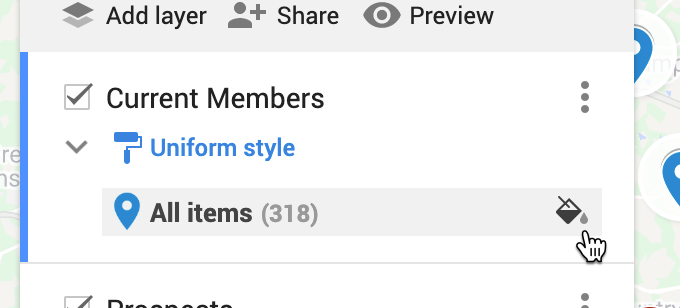
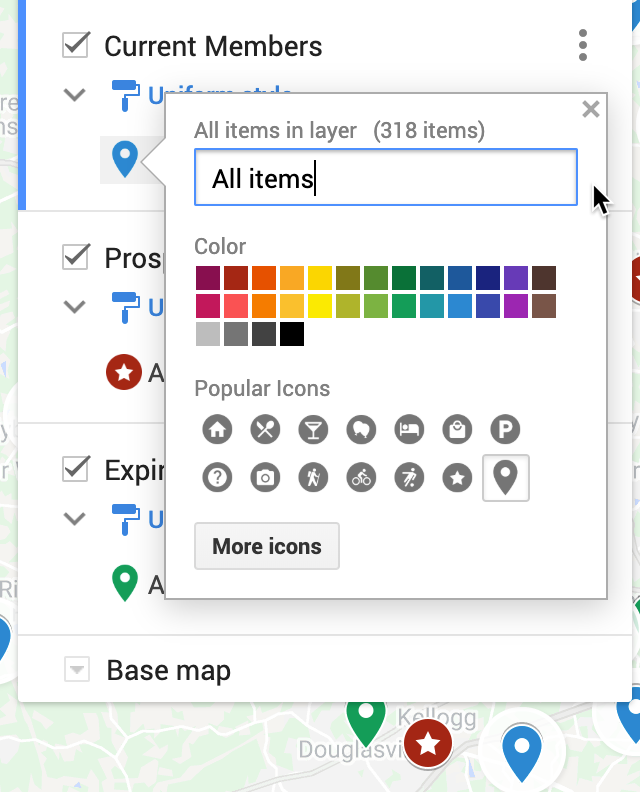
Select the paint icon next to a layer to change the icon and the colors.
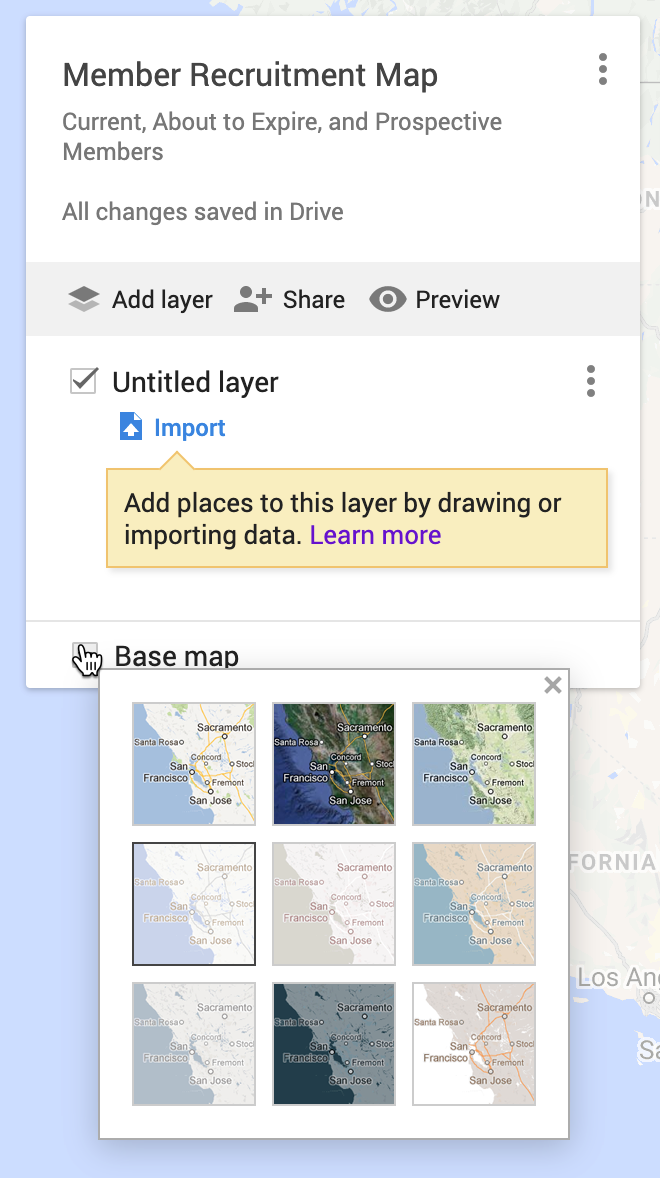
Change the background by clicking “Base Map.” Google provides several different options – terrain, satellite, streets, etc.
Event Planning: Create and keep a spreadsheet of event venues in your city and use as a layer in MyMaps to determine venue proximity to most members.
Members vs Nonmembers/Prospects: If you track Prospects (or have access to nonmember location data from another source) you can layer the spreadsheets in MyMaps to see the distribution of member versus nonmembers for recruitment purposes.
Make a Congressional District Map using your Member Map
Use Google MyMaps to view the distribution of your members within congressional districts.
- To start, you’ll need to have a member map already in MyMaps. The easiest way to create a new map with data you’ve already uploaded is to Copy the Map.
- To acquire the Congressional District boundaries, download the KML file from the U.S. Census. Find those here: Census Cartographic Boundary KML Files. Note, MyMaps has an upload limit of 5kb, so be sure the file is less than 5kb.
- Upload the KML file into your map. Once uploaded, you can edit the data in the KML file within the map: rename the file, rename items, recolor the districts, and delete any data you don’t need.
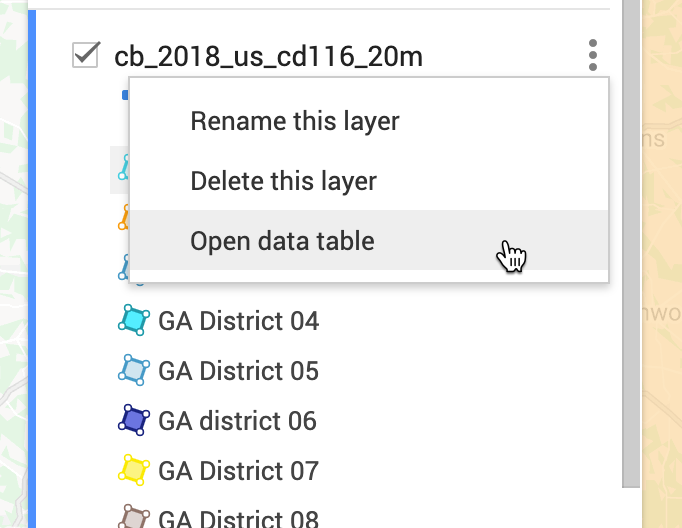
Tip: To edit multiple items within the KML file, click on the 3 dots next to the layer and select “open the data table” to make edits within the table.
Once your map is complete, you can print the map, embed it on your website, or share the link for others to view.